How to Organize Office Supplies for Maximum Efficiency
Let’s face it, sometimes our office desks resemble a miniature disaster zone. Pens migrate, papers pile up, and those staplers seem to disappear into thin air. But fear not. This blog post will give tips on where you should keep your office supplies for maximum efficiency. We’re taking back control with some simple, no-sweat tips that’ll transform your desk from clutter chaos to calm oasis. No fancy systems, just easy tricks to get you working smarter, not harder. So, where do we keep them?
Generally speaking, keeping your office supplies organized boils down to two things: knowing where your supplies are and making sure it’s easy to find. Every tip such as categorizing, labeling, and decluttering fall under these two things. By following those 2 basic rules, you can organize your office supplies for maximum efficiency.
Of course, knowing the basic 2 things is helpful but if you are looking for specific tips, then this blog post if for you as we deep dive into how to organize office supplies for any type of office.

Where do you keep office supplies?
Keeping your office supplies neat and tidy requires some specific tips. Here are 15 tips you can easily follow with tips to organize your workspace.
1. Organize by Frequency of Use
Divide supplies into categories based on how often you use them. Keep the most frequently used items within easy reach, while storing less frequently used items in drawers or cabinets.
For example: pens, notebooks, and highlighters – the stuff you use daily. These daily essentials deserve to be within your reach on your desk. Keep them close at hand. Try not to rummage through drawers for them.
For items you use less often, like the stapler, hole punch, or special pens, designate storage space in clearly labeled drawers or higher shelves. This keeps them easily accessible when needed but out of the way in your daily workflow. Think of it as a well-organized pantry, ready to provide when needed without cluttering your desk.
Of course, the daily things you use depends on your work. For example, we don’t regularly use rulers in our office but if you are working on design, then you might need it on a daily basis.
Thus, you need to assess whether the specific supply is what you are going to need daily.
Remember, Consistency is Key: Regularly review your organization system, label everything clearly, and make use of vertical space. This ensures your frequently used items stay easily accessible and prevents clutter from piling up. Soon, your desk will be a haven of order, and you’ll be a productivity powerhouse, tackling tasks with ease.
We will talk about vertical space next.

2. Embrace Vertical Storage
Make the most of your workspace by utilizing vertical storage solutions like wall shelves, pegboards, and hanging organizers. This frees up desk space and keeps supplies within arm’s reach.
Vertical storage solutions like wall shelves, pegboards, and hanging organizers are your secret weapons.
These space-saving supplies free up precious desk space and keep your most-used supplies close at hand. Picture it: wall shelves showcasing your pen collection like a mini gallery, pegboards where tools hang ready to tackle any task, or hanging organizers holding paper clips and sticky notes like colorful flags.
This is like building a mini office skyscraper for your supplies, maximizing space and efficiency. With vertical storage, everything’s in plain sight and ready to jump into action. So, ditch the drawer diving and embrace the wall space! Your desk will thank you.
Bonus Tip: Get creative! Use colorful shelves, fun pegboard patterns, or quirky hanging organizers to personalize your vertical space. Remember, organization can be fun! Make it functional and stylish, reflecting your personality and boosting your productivity.
3. Utilize Containers and Dividers
Keep small items like paper clips, pens, and sticky notes organized and easily accessible with clear containers, trays, and drawer dividers. This prevents them from getting jumbled and lost in drawers.
Feeling overwhelmed by paper clips disappearing like an endless game of hide-and-seek in your drawers? Clear containers, handy trays, and clever drawer dividers are your new allies in the fight against messy drawers. These organizational tools keep small items like paper clips, pens, and sticky notes organized and easily accessible, preventing them from becoming lost in the depths of your drawers.
No more fumbling through cluttered drawers – with containers and dividers, everything has its place, and finding what you need becomes a breeze.
Bonus Tip: Label your containers and dividers! This might seem obvious, but it’s a game-changer. Clear labels eliminate guesswork and make finding things even faster. Think of it as building a mini filing system for your desk supplies, boosting both organization and efficiency.
We’ll talk about labeling next.

4. Label Everything
Clear labeling makes it easy to find what you need at a glance. Use labels on shelves, drawers, containers, and bins to indicate what’s inside. You can even use colors or symbols for easy visual cues.
Labeling is your secret weapon for navigating your desk with ease. Think of it as building a map for your supplies, where everything has a name and a place.
Here are tips on how to label like a pro:
- Shelves and drawers: Give them clear titles like “Pen,” “Sticky Note,” or “Binder” No more peeking inside every drawer to find what you need.
- Containers and bins: Label them with the specific items they hold, like “Paper Clip” or “Highlighter” No more rummaging through mystery boxes.
- Get creative with colors and symbols: Use different colored labels for different categories (blue for pens, green for paper, etc.) or add symbols like a paperclip icon for binders or a highlighter icon for your favorite markers.
Bonus Tip: Make it fun! Use quirky fonts, colorful labels, or even hand-drawn doodles to personalize your labeling system. A touch of creativity can make organizing even more enjoyable.
With clear and consistent labeling, you’ll transform your desk from a confusing maze to a well-organized oasis. No more wasted time searching for misplaced supplies – time you can spend conquering your tasks with newfound efficiency!
5. Declutter Regularly
Schedule regular decluttering sessions to get rid of unused or expired supplies. Donate, recycle, or repurpose them to keep your workspace tidy and efficient.
Remember that pen you haven’t used since the 2019? Or the stapler that mysteriously eats staples for breakfast? It’s time to say goodbye! Regular decluttering sessions are your friends in the fight against desk clutter. Think of it as giving your workspace a mini makeover every now and then.
Here’s how to declutter your office space efficiently:
- Schedule it in: Block out some time each week or month to declutter your desk. Even 15 minutes can make a big difference!
- Be ruthless: Sort through your supplies honestly. Ask yourself: Have I used this in the past six months? Is it broken or expired? If the answer is no, it’s time to let go.
- Donate, recycle, or repurpose: Give unused items a new life by donating them to a school, office, or charity. Recycle those empty pen casings and paper clips. Get creative and repurpose old containers or folders for other uses.
- Embrace the “less is more” motto: The more you declutter, the easier it will be to keep your desk organized. Aim for a streamlined workspace with only the essentials you use regularly.
Bonus Tip: Make decluttering fun! Put on some music, grab a friend to help, or turn it into a mini decluttering challenge. Keeping it positive and engaging will make the process a breeze.
Remember, regular decluttering doesn’t just keep your desk tidy, it also boosts your efficiency and clears your mind for better focus. So, banish the clutter bug and embrace a streamlined workspace that supports your productivity!

6. Embrace Technology
Use apps or software to track inventory, manage orders, and set reminders for refills. This can help you stay on top of your supply needs and avoid running out of essentials.
Here’s how to leverage technology for organizing your office supplies:
- Inventory Tracking Apps: Say goodbye to manual counts! Use apps to keep track of your supply stock, seeing what you have and what’s running low at a glance. No more frantic last-minute dashes to the store.
- Order Management Software: Tired of the “out-of-stock” blues? Use software to schedule automatic reorders for your essentials, ensuring a steady flow of supplies and preventing productivity-crushing shortages.
- Reminder Powerhouses: Set up alerts and notifications to remind you when to restock specific items. No more relying on memory (or the empty paper clip box) to keep your desk running smoothly.
Bonus Tip: Explore different options! There are plenty of apps and software out there, designed for various needs and budgets. Do some research, find the ones that fit your workflow, and watch your organizational efficiency soar.
But since you are already here, here are some apps/website we’ve found to be useful! Feel free to check them our.
Free options:
- Sortly: A simple and visual inventory management app with barcode scanning, custom fields, and reporting capabilities. It offers a free plan with limited features and paid plans with more advanced features.
- Stocky: A user-friendly inventory app with purchase order creation, location tracking, and low stock alerts. It has a free basic plan and paid plans with additional features.
- Evernote: Though not specifically designed for inventory, Evernote offers powerful organizational tools including notes, checklists, and reminders. Use it to create dedicated notebooks for your office supplies, track stock levels, and set refill reminders.
Paid options:
- Orderhive: A comprehensive inventory and order management software with features like purchase orders, sales orders, and supplier management. It offers various pricing plans based on your business needs.
- Zoho Inventory: Another feature-rich inventory management software with real-time stock updates, barcode scanning, and automatic reorder points. It offers different pricing plans for small businesses and larger enterprises.
- Inventory Planner: A web-based inventory management and forecasting tool with advanced analytics and reporting features. It caters to small and medium businesses with various pricing plans.
Bonus website:
- Zapier: An automation platform that can connect your inventory management app or software with other tools like email, Slack, and Google Sheets. This allows you to automate tasks like sending refill reminders or updating spreadsheets, saving you time and effort.
Remember, embracing technology doesn’t replace personal organization, but it can be a powerful tool to support your efforts. So, use those digital tools to their full potential and create a desk environment that fuels your productivity and keeps you in control, never the other way around!
Recommended Read: With the rise of digital technology, you might wonder if office supplies are still important. Well, it is and we created a blog post on how both the digital and analog office supply tools can help you and your business here: Why Are Office Supplies Important?
7. Create a Designated Spot for Supplies
Ever feel like your desk becomes a mini post office for paper deliveries, notebooks, and office trinkets? Time to take control!
Designate a specific spot for incoming supplies to prevent them from cluttering your desk. This could be a basket, shelf, or drawer specifically for new items.
Ideas for Your Designated Spot:
- Baskets: A stylish basket on your desk or nearby shelf can corral those incoming papers, pens, and folders. Choose a fun color or pattern to add personality to your organization and inject a bit of visual cheer.
- Shelves: Have an unused shelf? Transform it into a dedicated supply haven! Label it “Incoming” or “To Be Sorted” to keep things clear and prevent your designated spot from becoming a mystery box.
- Drawers: A spare drawer can be your secret weapon against desk chaos. Use dividers to create compartments for different types of items, like paper, tech accessories, or office tools. Bonus points for drawer labels like “Pen Party” or “Sticky Note Haven” to keep things playful.
- Wall-Mounted Organizers: For space-conscious heroes, embrace the vertical! Install a hanging organizer or small wall shelves near your desk. This keeps the designated spot off your precious surface and adds a touch of modern flair.
Bonus Tip: Regularly review your designated spot! Once a week or so, sort through the items, categorize them, and file them away in their designated spots. This prevents the designated spot from becoming a permanent clutter station and ensures your organized flow keeps chugging along.
Remember, by creating a specific space for new arrivals, you can prevent them from cluttering your workspace and maintain a peaceful haven for focused productivity.

8. Personalize Your Space
Feeling like your desk is the blandest corner of the office universe? Time to inject some personality! Personalizing your space isn’t just about aesthetics; it’s about creating a workspace that inspires you and fuels your productivity. Think of it as transforming your desk into a haven of happy vibes and creative energy.
Add decorative elements like plants, photos, or artwork to create a more inspiring and enjoyable workspace. Personalizing your space can make you feel happier and more productive.
Here are some things to add for personalization ideas:
- Plants: Breathe life into your workspace with a mini jungle! Small succulents, air plants, or a vibrant desktop herb garden can add a touch of nature. Bonus points for colorful planters that match your style.
- Photos: Surround yourself with happy memories! Hang photos of loved ones, inspiring landscapes, or even funny animal pictures. Seeing familiar faces or calming scenes can boost your mood and combat workday blues.
- Art: Embrace your inner artist! Display a favorite painting, a quirky print, or even your own masterpiece. Art adds color, character, and sparks creativity, turning your desk into a mini gallery of inspiration.
- Quotes: Find a motivational quote that speaks to you and frame it! Seeing powerful words every day can uplift your spirit and remind you of your goals. Bonus points if you handwrite your own daily affirmations!
- Toys: Unleash your inner child! Keep a small toy on your desk that makes you smile, like a miniature superhero figurine or a quirky stress ball. A playful touch can lighten the mood and bring a dose of fun to your workday.
Remember: Personalization is all about YOU! Just like your dailies we talked about earlier, you will enjoy different things for your office space. The ones I provided above are the common things I find.
Choose elements that reflect your passions, hobbies, or anything that makes you happy. Your workspace should feel like an extension of your personality, a place where you feel comfortable, inspired, and ready to conquer your tasks.
Bonus Tip: Don’t be afraid to experiment! Change up your decorations once in a while to keep things fresh and exciting. Let your workspace evolve with you, reflecting your changing moods and creative journeys.
9. Embrace Flexibility
Your organization system should evolve with your changing needs. Don’t be afraid to adjust and tweak it over time to ensure it’s always working for you.
Here’s how to adjust your office organization:
- Regular Reviews: Schedule check-ins with your desk! Once a month or so, take a step back and assess your organization system. Are things still working? Have your needs changed? Don’t be afraid to rearrange containers, swap shelves, or even retire dusty organizers that no longer spark joy.
- Tweak with Time: Your tasks and workflow might shift over time. Adapt your organization system accordingly! Move pen trays closer if you’re suddenly writing a novel, or add a dedicated project box for that big presentation coming up. The key is to keep your system fluid and responsive to your changing work dynamics.
- Experiment: Don’t be afraid to try new things! Spotted a cool desk organizer online? Go for it! Saw a DIY hack for vertical storage? Give it a whirl! Experimentation is your friend, even if it doesn’t always work out. You might just discover a genius organizational hack that takes your productivity to the next level.
- Embrace Imperfection: Remember, your desk doesn’t need to be a Pinterest-perfect haven of minimalism. Some clutter is inevitable, and a touch of personality can be inspiring. Embrace the occasional messy stack of paper or the quirky figurine collection – after all, it’s your workspace, not a museum!
Bonus Tip: Listen to your inner voice! If something feels clunky or inefficient, it probably is. Don’t be afraid to make adjustments, however small. Remember, a flexible system is a happy system, and a happy system equals a productive you!
By embracing flexibility, you’ll ensure your organization system becomes an adaptive tool, evolving with you and supporting your productivity journey every step of the way. So, break free from the shackles of rigidity, experiment with joy, and watch your workspace transform into a dynamic haven of focused accomplishment!
10. Color-Code for Quick Identification
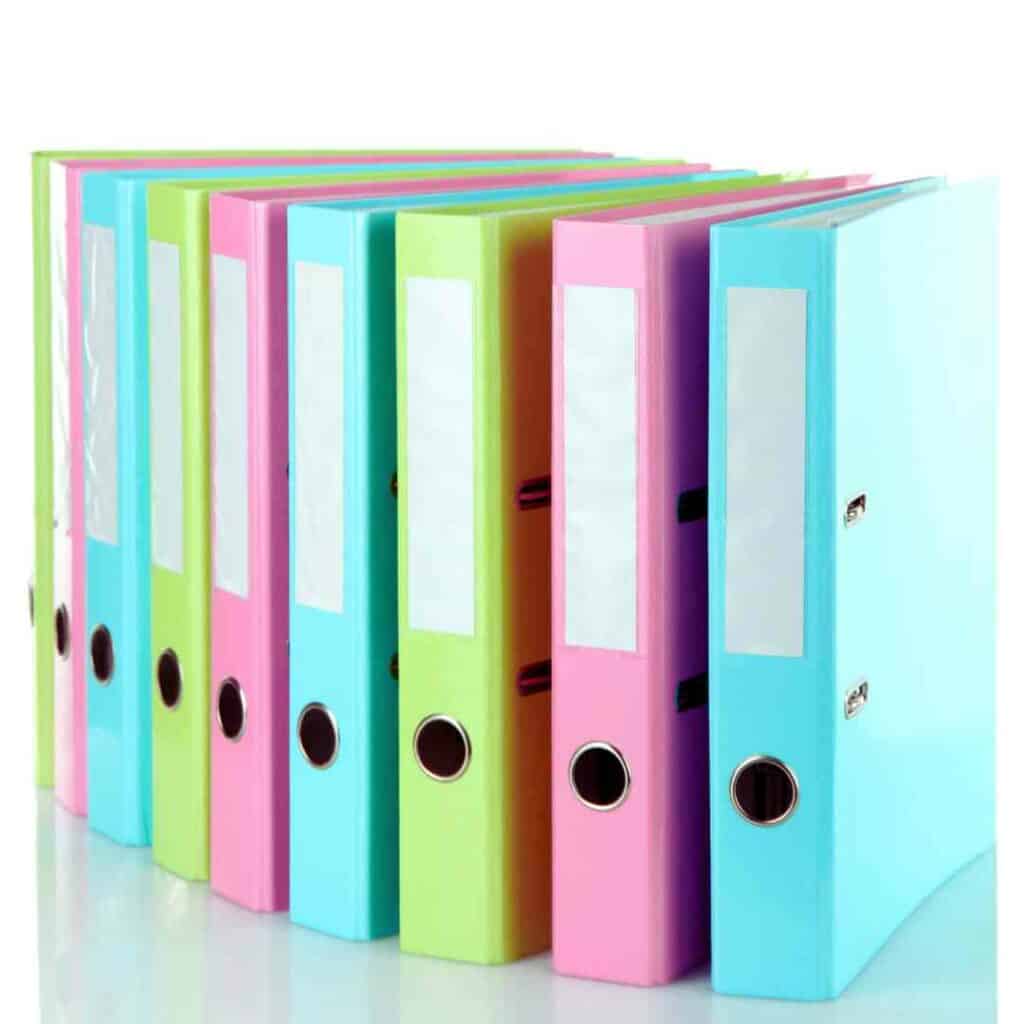
Assign different colors to different categories of supplies (e.g., blue for writing utensils, green for paper, yellow for electronics) for visual organization. Use colored labels, folders, or containers to implement this system.
This simple strategy transforms your desk into a neatly organized rainbow, where every supply has its designated hue, making it super easy to find what you need in a flash. Think of it as painting a masterpiece of organization, one colorful drawer at a time.
Here’s how to color-code your desk:
1. Choose Your Color Palette:
- Keep It Simple: Stick to 3-5 colors to avoid overwhelming the senses. Aim for colors that complement each other and align with your personal taste.
- Consider Meaning: Assign colors based on category or importance. For example, blue for writing utensils, green for paperwork, yellow for project-related items, or red for urgent tasks.
- Personalize It: Choose colors that spark joy and reflect your personality. If pink brings a smile to your face, make it your stapler’s shade!
2. Gather Your Tools:
- Colorful Labels: Print or write labels on colorful paper or use colored sticky notes to designate drawers, shelves, or containers.
- File Folders: Use different colored file folders to categorize paperwork, projects, or receipts.
- Containers: Invest in colorful bins, baskets, or drawer organizers to group supplies by color.
- Creative Touches: Add color-coded washi tape, paint pen accents, or even DIY drawer liners for extra visual appeal.
3. Implement Various Colors
- Assign Colors: Categorize your supplies and assign a color to each category. Be consistent with your system to avoid confusion.
- Label It All: Label drawers, shelves, containers, folders, or even individual items with their designated colors.
- Create Visual Cues: Use color-coded borders on bulletin boards or tape colored markers on your desk for quick reminders.
Bonus Tip: Extend the color-coding to your digital organization! Use color-coded labels in your email inbox, create color-coded folders on your computer, or use different colored highlighters for digital notes.
11. Declutter in Stages
Feeling overwhelmed by the thought of tackling a mountain of desk clutter in one go? Break down the decluttering process into smaller, more manageable tasks. Tackle one drawer, shelf, or category at a time to avoid feeling overwhelmed.
Here’s a how to break down the decluttering journey into manageable steps:
1. Choose Your Starting Point
- Begin with Ease: Select a smaller, less intimidating area to start, like a single drawer, a corner of your desk, or a specific category of supplies. This builds momentum and confidence.
- Focus on Pain Points: Identify areas that cause the most frustration or hinder your productivity. Decluttering these first will produce immediate relief and motivation.
2. Set a Time Limit
- Small Bites, Big Impact: Commit to short decluttering sessions, like 15-30 minutes, to avoid feeling overwhelmed. Regular, consistent bursts are more effective than sporadic marathons.
- Use a Timer: Set a timer to stay focused and create a sense of urgency. This gamification technique can make decluttering more engaging.
- Respect Your Limits: If time runs out, don’t stress! Simply pause, celebrate your progress, and resume when you’re ready for the next round.
3. Decluttering Toolkit
- Bags or Bins: Have designated bags for trash, recycling, and items to donate or relocate. This keeps your workspace clear and streamlines the sorting process.
- Labels: Create labels for containers or drawers to maintain organization and make it easier to find things later.
4. Decluttering Steps
- Remove Everything: Take everything out of the designated area to have a clear view of what you’re dealing with.
- Categorize and Sort: Group items into categories like “keep,” “toss,” “donate,” or “relocate.” Be ruthless with your decisions – if you haven’t used it in a year, chances are you don’t need it!
- Clean and Reassess: Wipe down surfaces and containers before putting items back in their designated spots. This refreshes your space and gives you a chance to rethink your organization system.
5. Celebrate and Repeat
- Acknowledge Wins: After each decluttering session, take a moment to appreciate your progress, no matter how small. This reinforces positive habits and keeps you motivated.
- Schedule the Next Stage: Plan your next decluttering adventure, whether it’s the next drawer or a different category. Consistency is key to maintaining a clutter-free workspace.
Bonus Tip: Embrace flexibility! If you get sidetracked or need to adjust your timeline, don’t beat yourself up. Simply adjust your plan and keep moving forward. Remember, slow and steady wins the clutter-free race!
12. Create a Creativity Corner
Feeling like your desk is more cubicle than canvas? Designate a small space for brainstorming and creative activities, stocked with colorful pens, markers, sticky notes, and other inspiring tools.
Use your Creativity Corner regularly! Schedule brainstorming sessions, doodle during breaks, or simply spend time there to recharge your creative batteries. Remember, it’s your personal wonderland, so let your imagination run wild and watch your ideas flourish!
By cultivating a dedicated Creativity Corner, you provide a dedicated space for your inner artist to thrive. It’s a haven for brainstorming, doodling, and letting your imagination soar. So, embrace the colorful chaos, unleash your creative spirit, and watch your workspace transform into a hub of inspiration and innovation!
13. Maintain Cleanliness
Let’s face it, even the most organized desk can accumulate dust. Regularly dust and wipe down shelves, drawers, and containers to keep your workspace clean and inviting. A clean environment promotes productivity and focus.
Here’s how to keep your desk squeaky clean:
1. Dust Sessions: Schedule weekly dust busting sessions to keep those fluffy intruders at bay. A quick swipe with a microfiber cloth on shelves, drawers, and containers will ban the dust bunnies and keep your workspace looking fresh.
2. Wiping: Once a week or so, grab a disinfectant wipe or cleaning spray and give your keyboard, mouse, and other frequently touched surfaces a good scrub. Bonus points for tackling spills and smudges immediately – preventing them from becoming permanent residents.
3. Cleanliness Rewards: Celebrate your efforts! Treat yourself to a new desk plant, a fun organizational tool, or simply a blissful five-minute break after each cleaning session. Positive reinforcement keeps you motivated and makes cleaning feel like a mini achievement, not a chore.
Remember, a clean workspace is a happy workspace. Regular upkeep keeps your environment focused and inviting, allowing you to tackle your tasks with renewed clarity and confidence. So, grab your cleaning heroes, channel your inner tidiness champion, and watch your desk transform into a haven of sparkling productivity and serenity!
14. Embrace Minimalism
Keep only the essential supplies you use regularly on your desk. Store backups and less frequently used items in designated storage areas.
Think of it as decluttering your way to creating a workspace that’s sleek, focused, and free from the chaos of clutter. Remember, less can truly be more, especially when it comes to desktop real estate.
Remember, minimalism isn’t about deprivation, it’s about intentionality. Surround yourself with items that spark joy, inspire you, and fuel your productivity. A tidy, minimal workspace can boost your focus, reduce stress, and even unlock a surge of creative energy.
Thus, make minimalism a habit! Schedule regular decluttering sessions to prevent clutter from creeping back in. As you acquire new items, ask yourself if they truly deserve a spot on your minimalist haven. Remember, less is indeed more, so choose wisely and enjoy the liberating peace of a clutter-free desk.

15. Promote Team Organization
Conquering your own desk chaos is one thing, but imagine a workspace where organization thrives like a well-watered plant, spreading from desk to desk and blossoming into a team-wide productivity paradise!
Share your best practices with colleagues and encourage them to adopt similar organization strategies. Create a shared inventory system or designated supply areas for communal items.
Get creative! Organize friendly competitions for the tidiest desk, award “Most Improved Organizers,” or even hold raffles for fun desk accessories. Injecting a bit of playful competition can keep everyone motivated and engaged in the organization journey.
By promoting team organization, you’ll not only enhance individual productivity but also foster a culture of collaboration and shared responsibility. Watch your workspace transform into a beacon of efficiency, mutual respect, and the sweet satisfaction of conquering chaos together!